
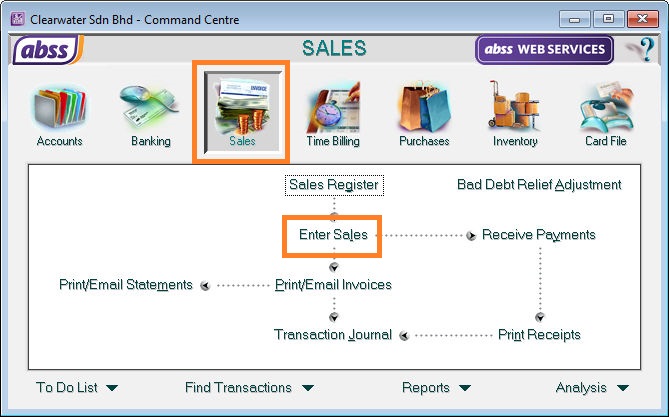
To create a Sales Invoice, in the ABSS Command Centre, click on Sales, then Enter Sales.
Quote, Order or Invoice?
In the Sales entry screen, you have 3 options to choose from:
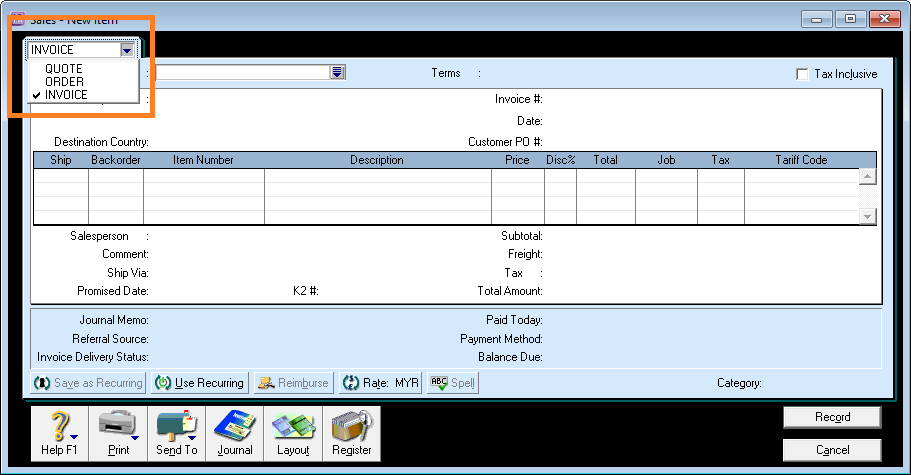
- Quote – this enables you to create a quotation for the services you provide or products that you sell and send it off to your customer.
- Order – this is a sales order. When a customer confirms purchase of services or products from you, select Order and enter the details here.
- Invoice – When you have performed the services or delivered the products, create an invoice to your customer by selecting this option
Note that it is not necessary to create a Quote or Order first.
You can create a Sales Invoice directly, which is what we will be doing in this guide.
If it is not already selected, from the selection box at the top left of the form, choose the Invoice option.
Customer details
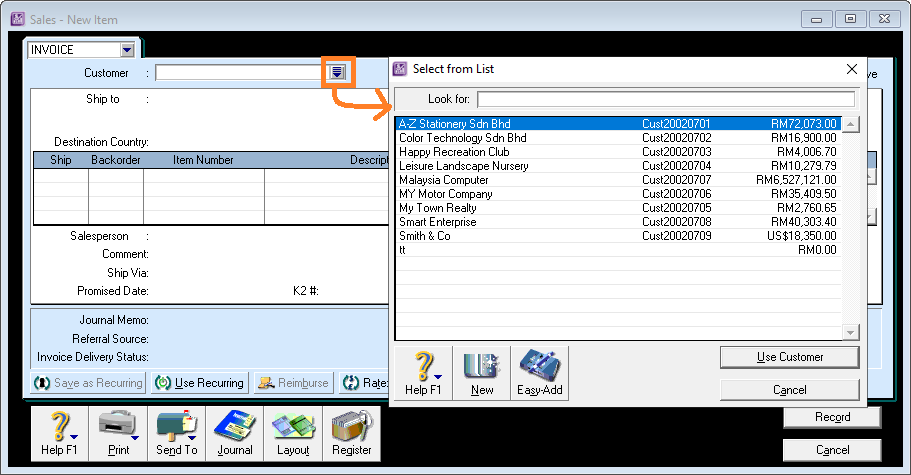
Next, select the customer you are sending this invoice to by clicking the arrow at the end of the Customer field as shown in the image below:
Invoice layouts
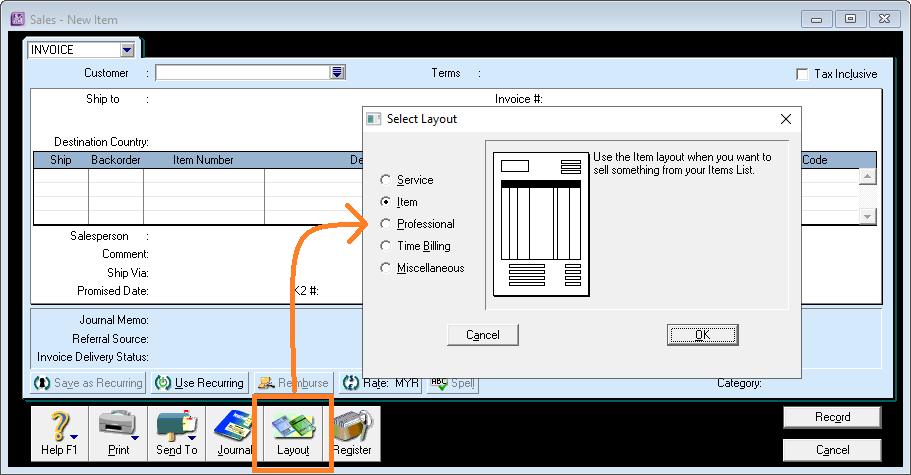
ABSS offers 5 different invoice layout options, depending on the nature of your business.
The 2 most commonly used layouts are:
- Service – this layout is used to invoice a customer for services rendered.
- Item – If your business sells products, this would be the layout to use as it allows you to enter quantities.
- The other layouts are Professional, Time Billing and Miscellaneous.
For this example, we will be using the Service layout.
Click on the Layout button at the bottom of the screen, then select the Service option as shown.
Invoice header details
Enter the invoice number and date in the relevant fields to the right of your screen.
If the customer has sent you a purchase order, enter their PO number in the Customer PO# field.
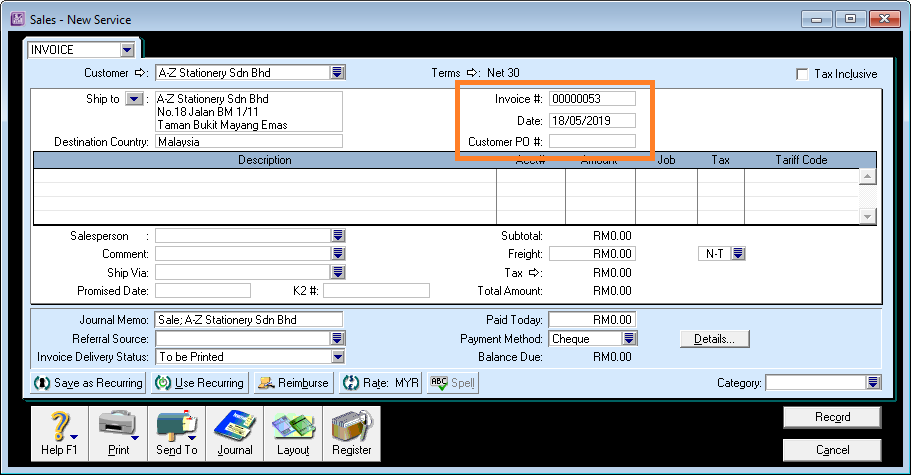
For invoice numbers, ABSS automatically increments it and you will see “Auto #” in the field if you click in it.
If this is the first time you are creating an invoice, and you want to start with a different number, you can type it in.
Sales description
The next step is to enter the description for the invoice.
Click inside the Description column as shown below:
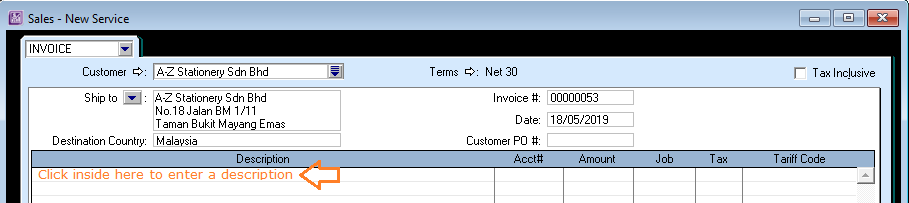
Once you have entered a description, press the Tab key on your keyboard to move to the Acct# field.
Income account
Here, select your income account.
In ABSS, the first digit in the account number represents the type of account, income, expense, etc. (learn more about ABSS account numbers)
Income accounts begin with 4, so type in “4”, then press the Tab key to bring up the account selection list.
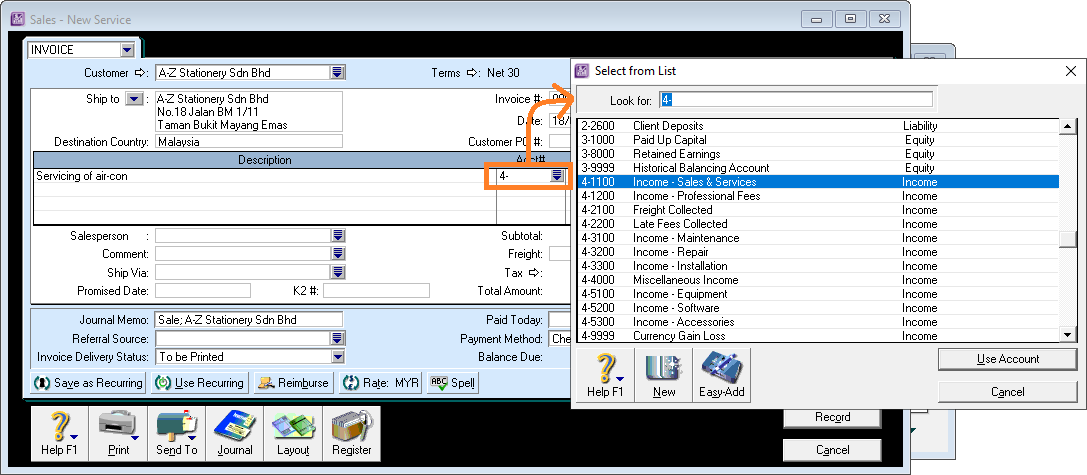
If you are following along with the sample data file, then select the “4-1110 Income Sales & Services” account.
Sales & Services Tax
Next, press the Tab key twice to get to the Tax column.
Here, depending on whether you are registered for SST and the type of product/service, you would select the Service Tax code “S06”.
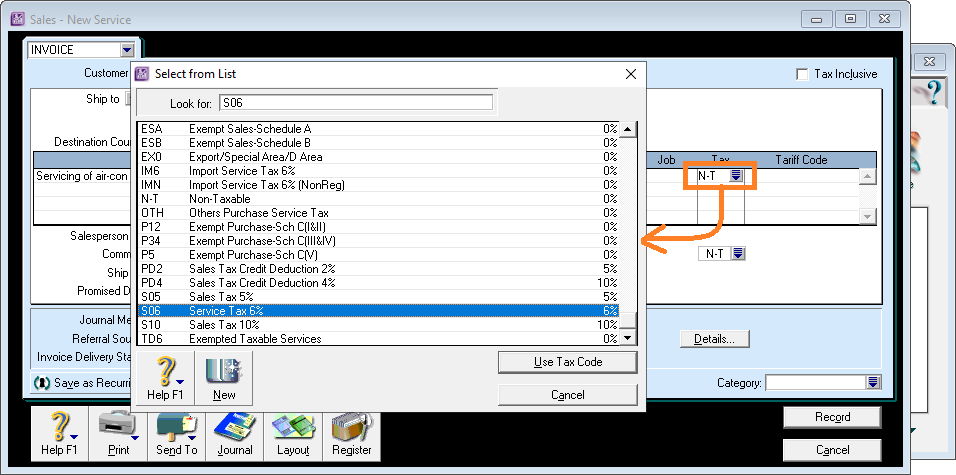
Press the Tab key to move to the next line and add more details to the invoice if necessary.
When the invoice is complete, click the Record button to save the invoice.
That’s it! You’ve just created your first invoice in ABSS!
Of course, the next step would be to print the invoice and send it to the customer.
This will be covered separately together with how to record a customer payment.
For a more detailed description of the fields in the Sales screen, please feel free to read our article on Invoicing application – ABSS.
Did you know?
We say ABSS is easy to use, but don’t take our word for it.
We’ve shown you how to enter a sales invoice.
Would you believe that you now know how to enter a supplier invoice?
Try it out.
In the ABSS Command Centre, click on Purchases then Enter Purchases.
Exactly the same, except this time it’s for Purchases!